We offer private, customized training for 3 or more people at your site or online.
In the previous tutorial, I showed you how to create a Departments Lookup Column that pulls information from a dedicated SharePoint Departments list. In this tutorial, I will teach you how to create additional columns in that Departments list.
I'm going to create two additional columns - Department Contact and Department Contact Phone - and then add values into the new columns for each department. I'll then modify the Departments Lookup Column to "project" these new columns so that they are visible in the document library that we already configured to use the Departments column.
Creating Additional Columns
Let's start with creating the additional columns in the Departments list. Please note that you need to be a site owner or administrator to make the modifications in this article.
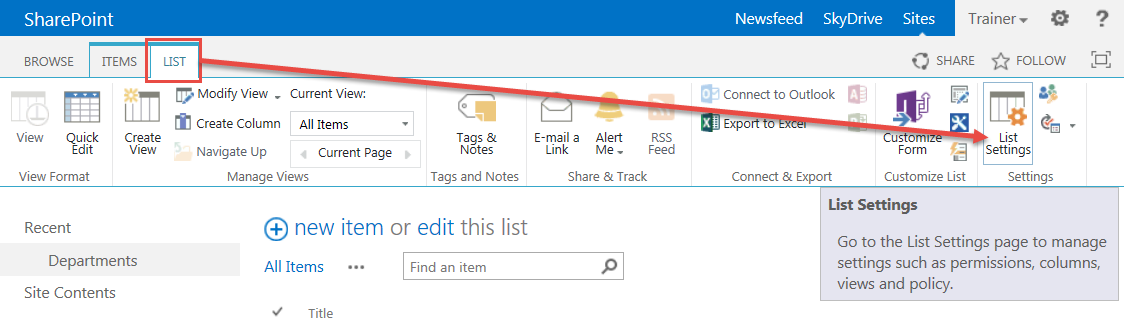
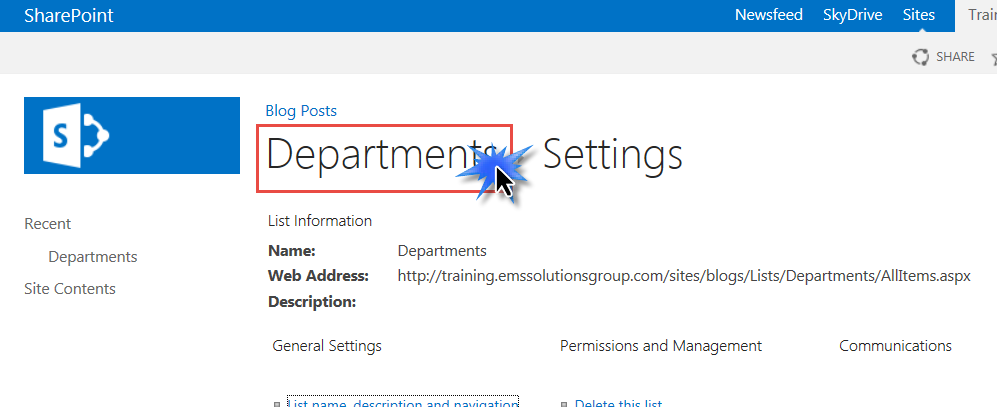
Start by navigating to your Departments list. Once there, click the List tab in the ribbon and choose List Settings.
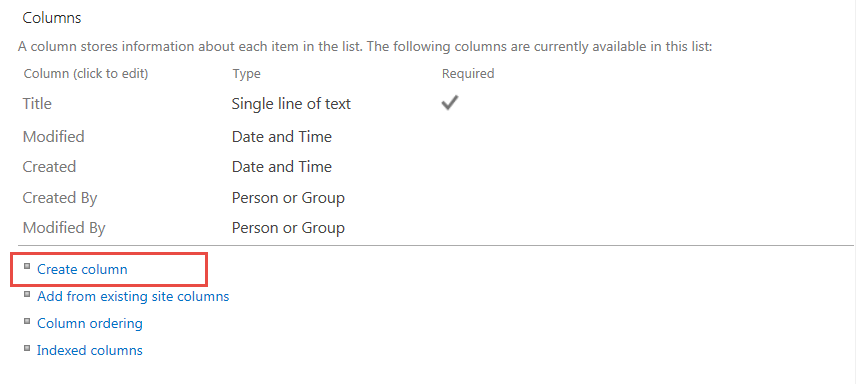
The List Settings screen will open. Scroll down to the section labeled "Columns and click the Create Column link.
Now, there are a number of different ways to create columns. In a production environment, I would use the Person or Group column type when creating columns that store a person's name, but I want to keep this basic and easy for all to follow. So, in this article, our columns are going to be simple text columns.
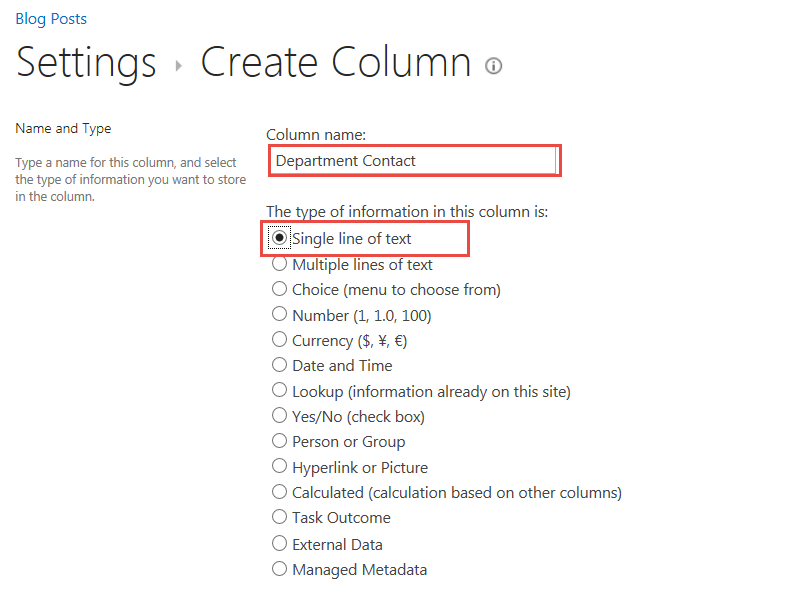
So, on the Create Column page, type Department Contact in the Title column, choose Single Line of Text as the column type and click the OK button to save the column.
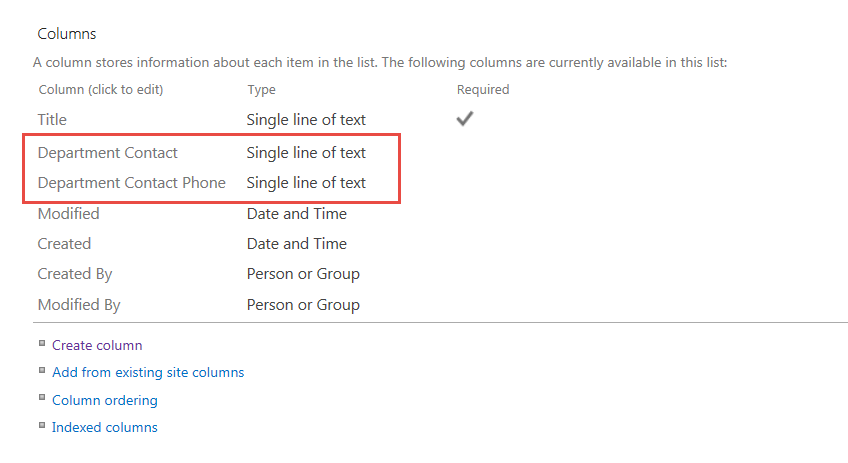
Let's go ahead and click the Create Column link again to create the Department Contract Phone column. On the Create Column screen, type Department Contact Phone in the Column Name box, choose Single Line of Text for the column type and click OK. You should see the two new columns in the column list, as shown below:
Now let's populate those columns for each department in our Departments list. If you scroll back up to the top of the page, SharePoint provides breadcrumbs on the top of the page to allow you to navigate back to the list. Click the Departments title to go back to the Departments list page.
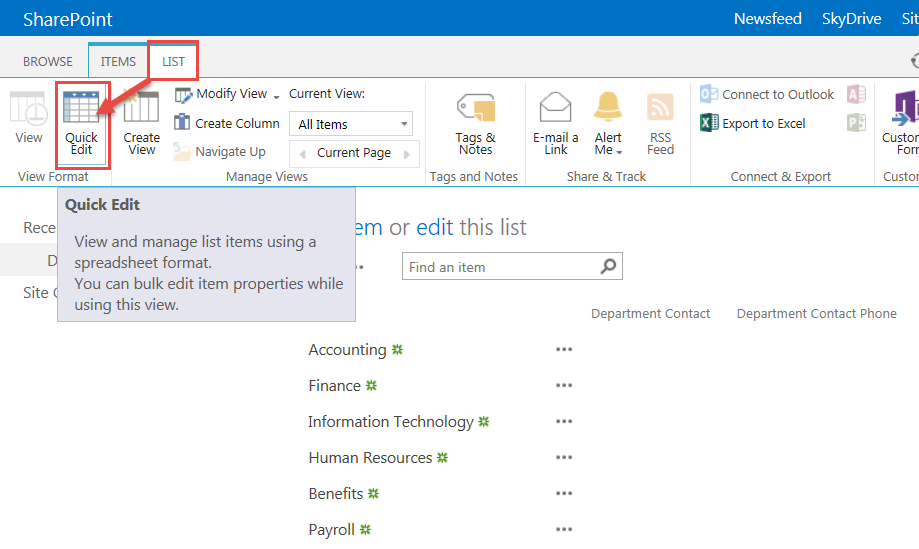
I prefer to edit my lists using the Quick Edit feature. This feature is available on the Ribbon by clicking the List tab and then clicking Quick Edit.
When in Quick Edit mode you are able to add values to the columns just like you do in Excel.
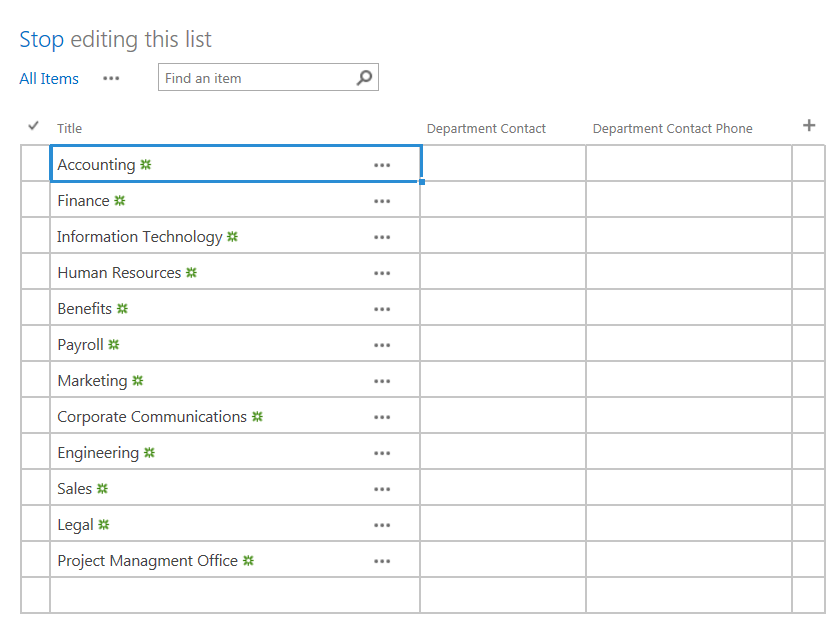
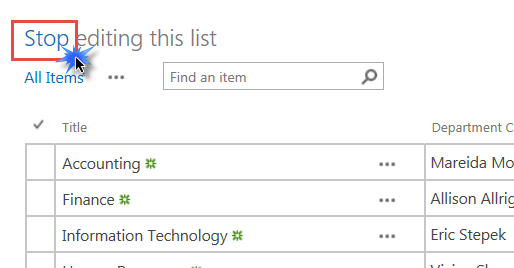
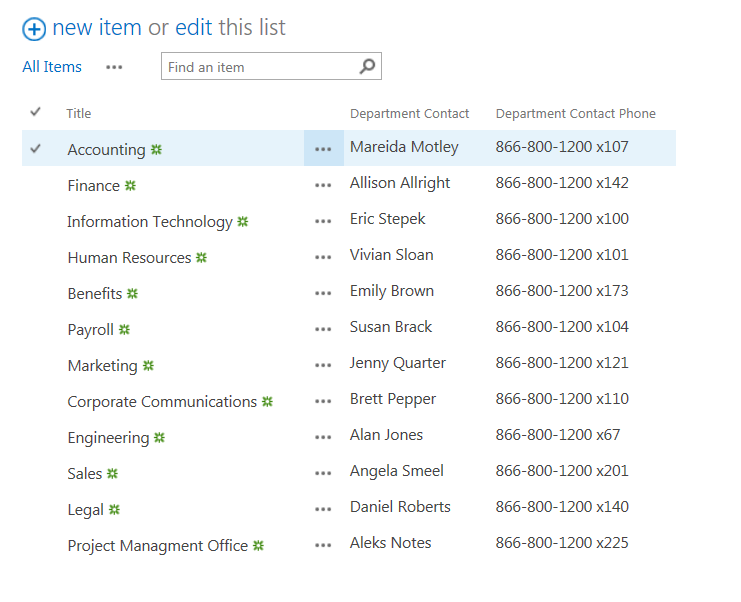
Go ahead and populate Department Contact and Department Contact Phone columns for each of your departments. When you have completed entering the department contact information, click the Stop link above the Excel-like table.
The complete list of values I used are shown below. Feel free to use my values or come up with your own.
Now, I'll modify the Departments lookup column to project the additional columns. In the Ribbon, click the Library tab and click Library Settings button.

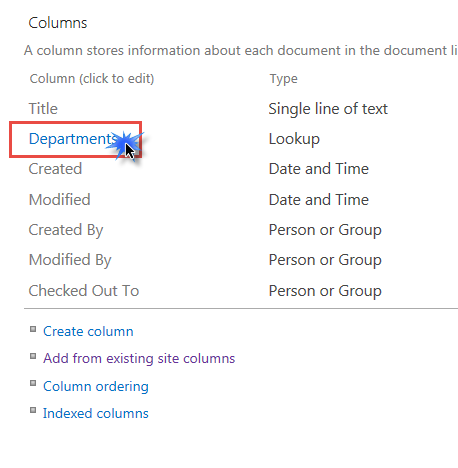
On the Library Settings page, scroll down to the Columns section and Find the Departments column. Click on it to open the properties page.
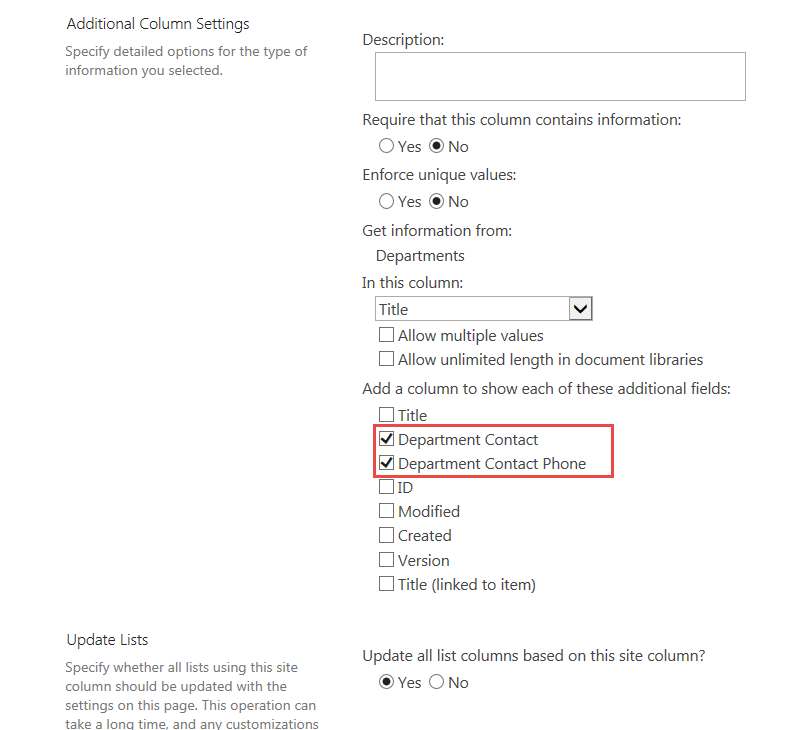
On the Departments column properties page, scroll down to the bottom of the page and click the Department Contact and Department Contact Phone, then click OK, as shown below:
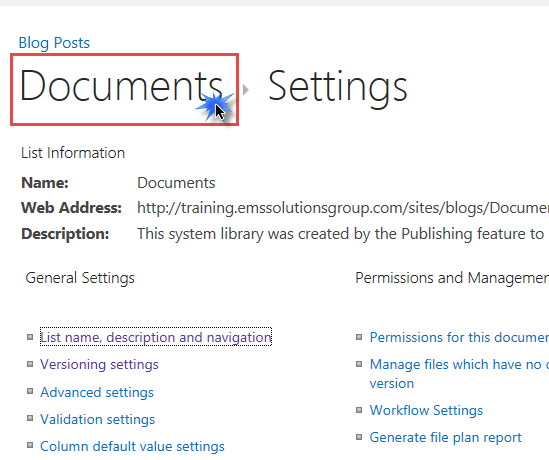
Click the Documents breadcrumb to return to the Documents library.
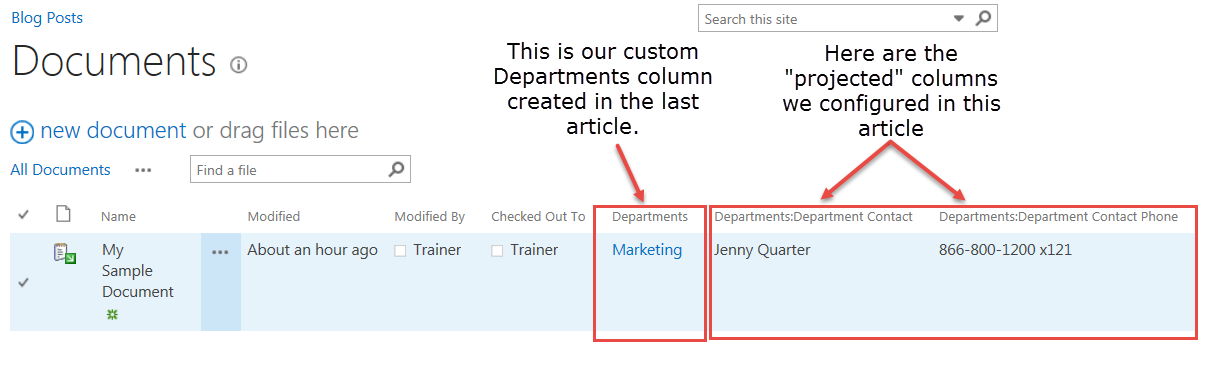
In the last tutorial, I uploaded the "My Sample Document" text document to the default Documents library, which had the Departments column already added to it. In this article we extended the Departments list to include two additional columns and then configured the Departments column to "project" the Department Contact and Department Contact Phone.
Notice that once I selected the additional projected department columns, they automatically show up in the default view.
Happy SharePoint-ing!
Author: Eric Stepek, one of Accelebrate’s SharePoint instructors
Previous: Creating a "Departments" Dropdown using a Lookup Column
Next: Creating a Content Type for the Timesheet InfoPath Form
In-Depth SharePoint Training
For in-depth SharePoint training, click here to view all of Accelebrate's SharePoint training courses for you and your staff.
Request Pricing
|

