We offer private, customized training for 3 or more people at your site or online.
Machine learning, as well as its related topics of data science and robotics, have been mesmerizing the world with technological advancements and promises of artificial intelligence.
Getting started with Machine Learning can seem like a daunting task as it requires knowledge of programming, mathematics, and the subject area for which the machine learning is being applied.
However, Machine Learning doesn't have to be overwhelming if broken down into digestible, step-by-step chunks. In this three-part tutorial, you will learn how to get started with Python and Jupyter Notebooks, delve into machine learning classifications with a Support Vector Machine (SVM), and finally learn some SVM Advanced Techniques.
Throughout these tutorials, we will use a dataset of digit images with the Support Vector Machine (SVM) machine learning algorithm, allowing you to run some real machine learning experiments.
Part 1: Getting Started with Python and Jupyter Notebooks
In Part 1 of this tutorial, we will install the Anaconda distribution of Python. Once installed, a Python environment will be configured using Conda. Finally, we will create and execute a new notebook with Jupyter Notebooks.
Step 1. Install Anaconda
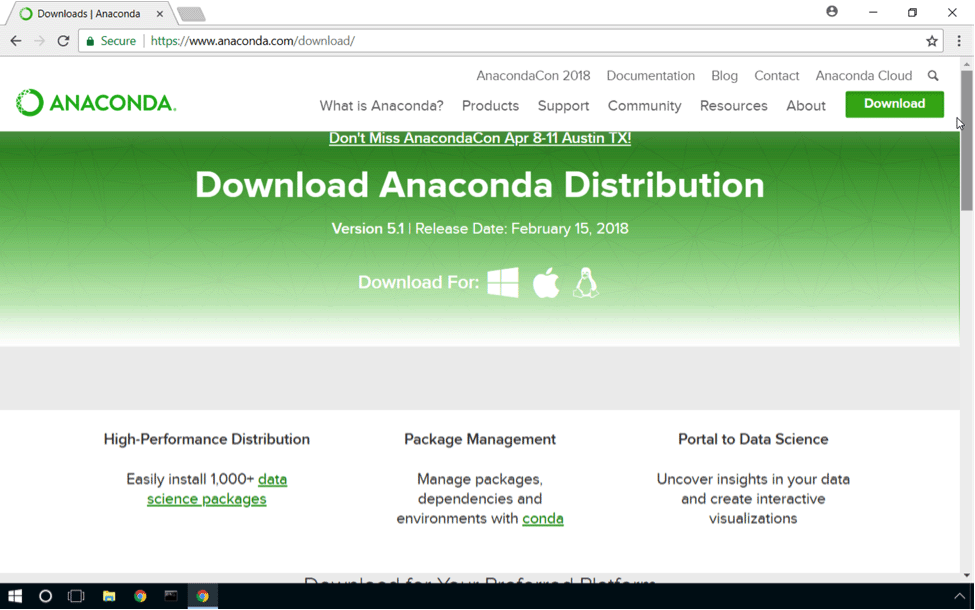
Step 1.1 To get started with Anaconda, open a web browser and navigate to:
http://www.anaconda.com/download
The web page should look similar to this:
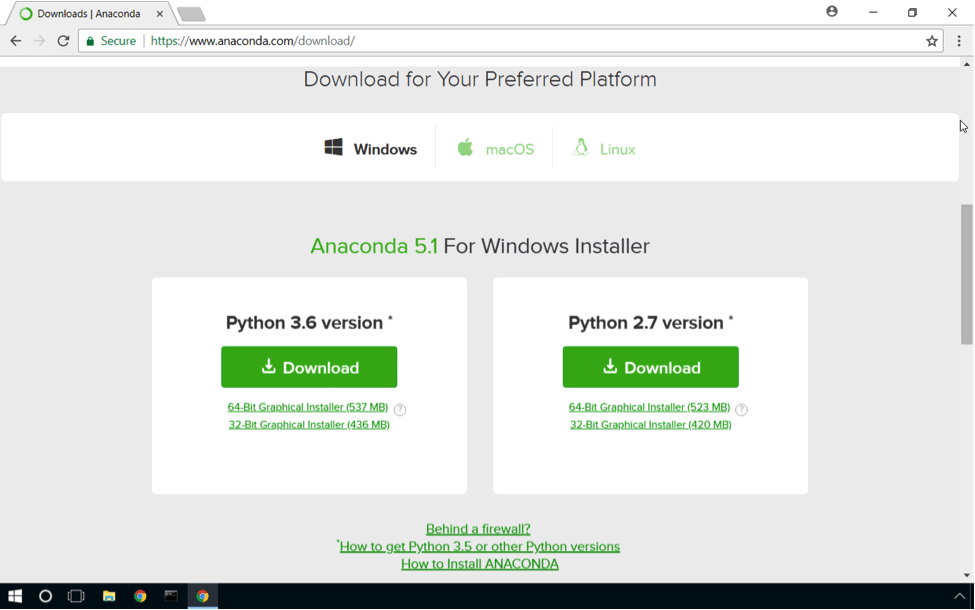
Step 1.2 Next, scroll down the web page and click the "Download" link for the Python 3.x version of Anaconda. Anaconda will be downloaded to your specified "Downloads" folder.
Step 1.3 After the download is complete, open your file explorer and navigate to the folder where the Anaconda installer placed.

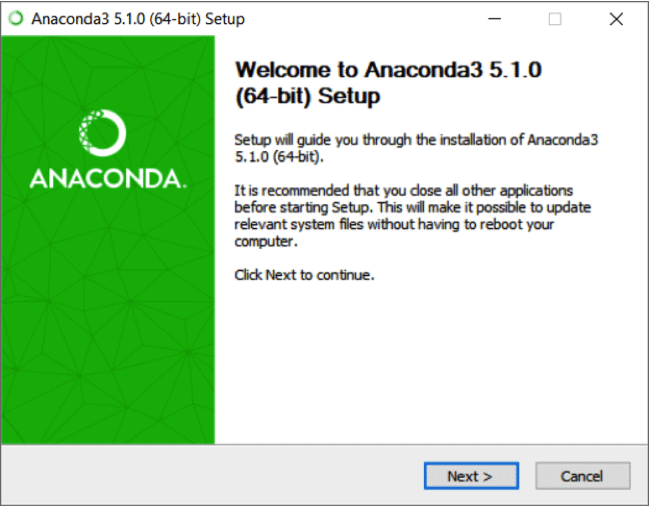
Double click the Anaconda installer to install Anaconda. When the installation starts, you will be guided through a series of installation steps.
Step 1.4 For the first step, click 'Next'.
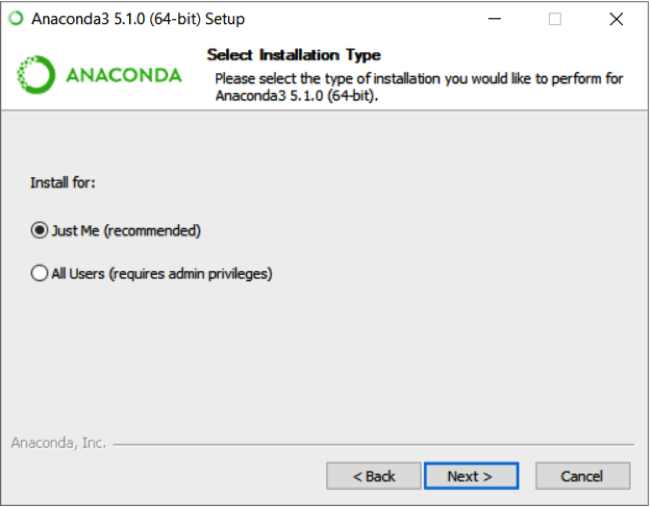
Step 1.5 You will be given the option of installing Anaconda for "All Users" or "Just Me." Unless you started the installer with administrative privileges (not recommended) and you intentionally want to install Anaconda for "All Users," it is recommended to leave the default option, "Just Me" selected. Click "Next'.
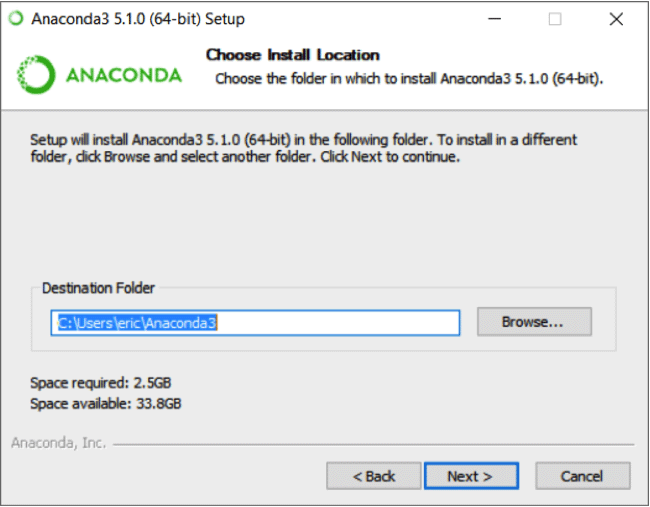
Step 1.6 The default location is for a "Just Me" installation with your user folder. Accept the default and click 'Next'.
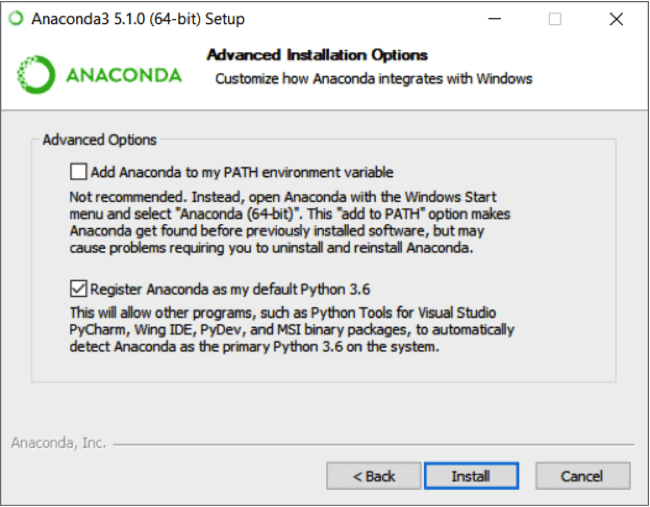
Step 1.7 The final installation step presents two advanced options. The first option enables Anaconda to be added to the PATH environment variable. By adding Anaconda to the path, you can open any command prompt and run the various applications installed via Anaconda, including Python and Jupyter Notebooks itself, from any directory.
While this sounds convenient, it is possible that including Anaconda in the path could impact other applications; specifically, their ability to run Python version 2.x. Therefore, it's best to leave the box unchecked. Instead, Anaconda provides a special command prompt that adds the path only to that command prompt window allowing Anaconda and its associated program to be easily used.
The second option registers Anaconda as the default for Python 3.x. Keep this box checked. It does not interfere with Python 2.x configurations and enables easier support for Anaconda within development tools such as Visual Studio Code.
Click 'Next' and Anaconda will install itself.
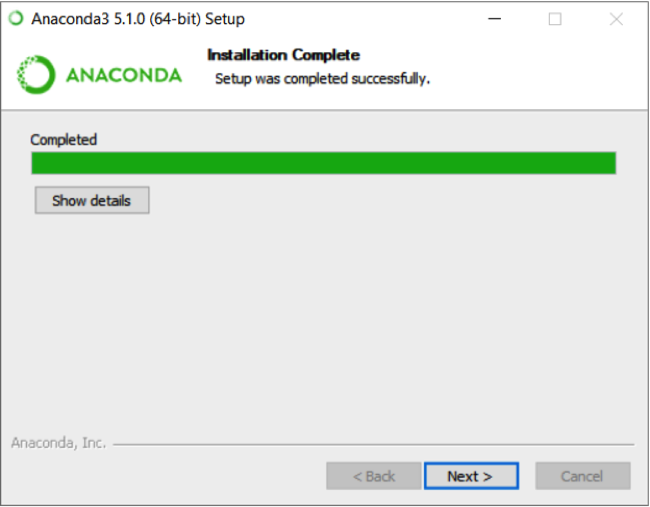
Step 1.8 Once the install is completed, "Completed" will be displayed above the progress bar. Click 'Next'.
Recently, the Anaconda installer started promoting Visual Studio Code. Visual Studio Code is an excellent, free, cross-platform editor, and I use it for Python and Machine Learning programming all the time. While this tutorial focuses on Jupyter Notebooks, Accelebrate has a webinar that explores Machine Learning and Anaconda with Visual Studio Code. Check it out here:
https://www.youtube.com/watch?v=DOA0SkClQhU
Step 1.9 Visual Studio Code is not covered in this tutorial, but if you would like to use it, click the "Install VSCode" button. Otherwise, click 'Skip'.

Step 1.10 Finally, uncheck the two boxes to learn more about the "Anaconda Cloud" and "How to Get Started with Anaconda" and then click 'Finish'.
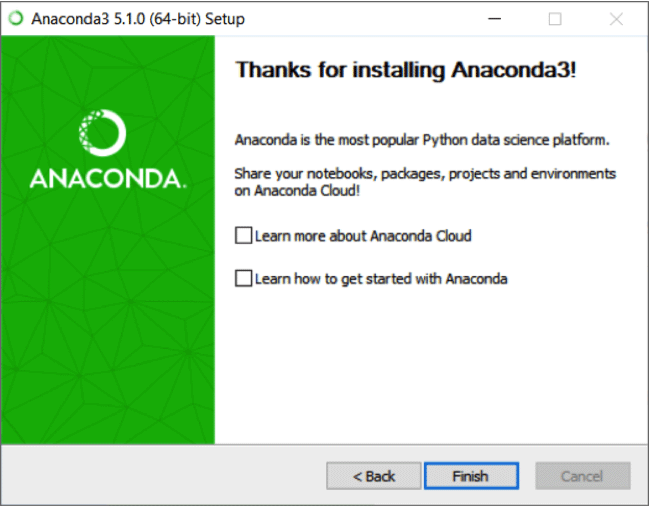
Excellent! Anaconda is now installed!
Step 2. Setup a New Conda Environment
With Anaconda installed, the next step is to configure a Conda environment. There are several tools in the Python space which can be used to configure environments. They include VirtualEnv, Vagrant, and Conda. This tutorial will use Conda since it is distributed with Anaconda.
Step 2.1 To get started with Conda, open the "Start" menu, expand the Anaconda folder, and run the Anaconda Prompt program.
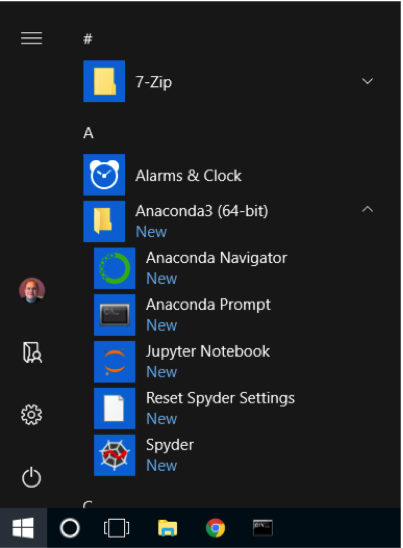
The Anaconda Prompt will open a command prompt with the paths for Anaconda and its programs configured.
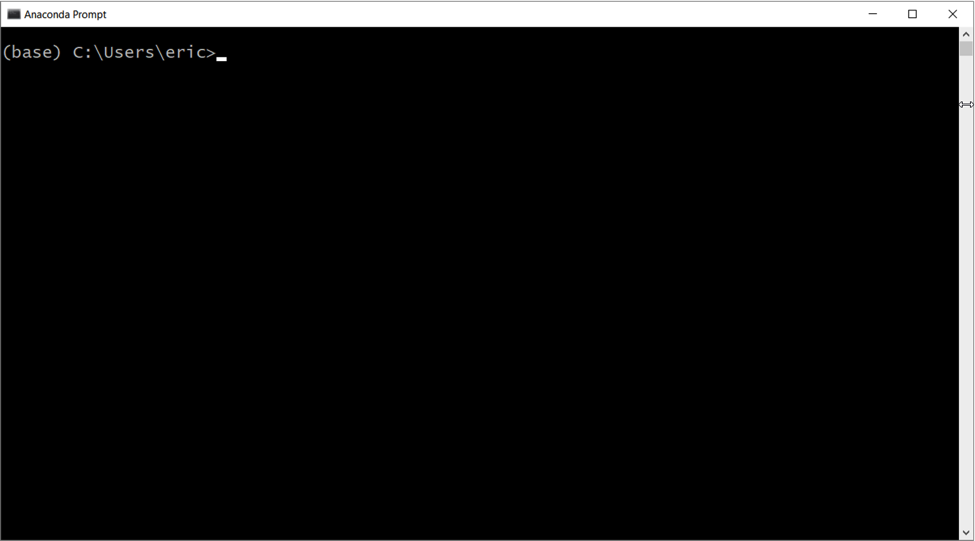
When setting up a new Conda environment, it's a good practice to verify the current list of environments that are already configured. While this is a new installation of Anaconda (meaning only the "base" environment will exist), it is still good practice to check.
Step 2.2 Run the following command from the command prompt and observe the output:
conda env list
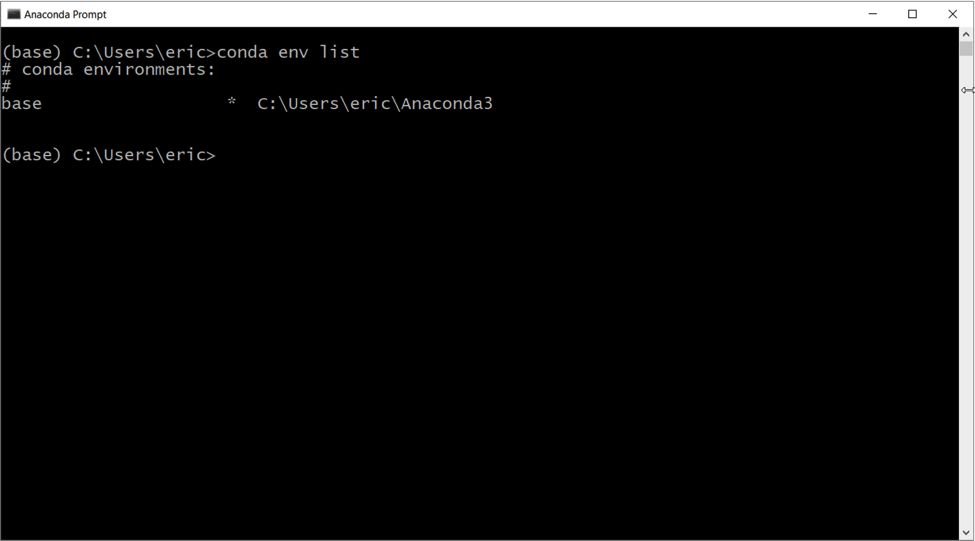
There is no environment named "ml_tutorial" in the list, so let's create one.
Step 2.3 Run the following command from the command prompt:
conda create --name ml_tutorial
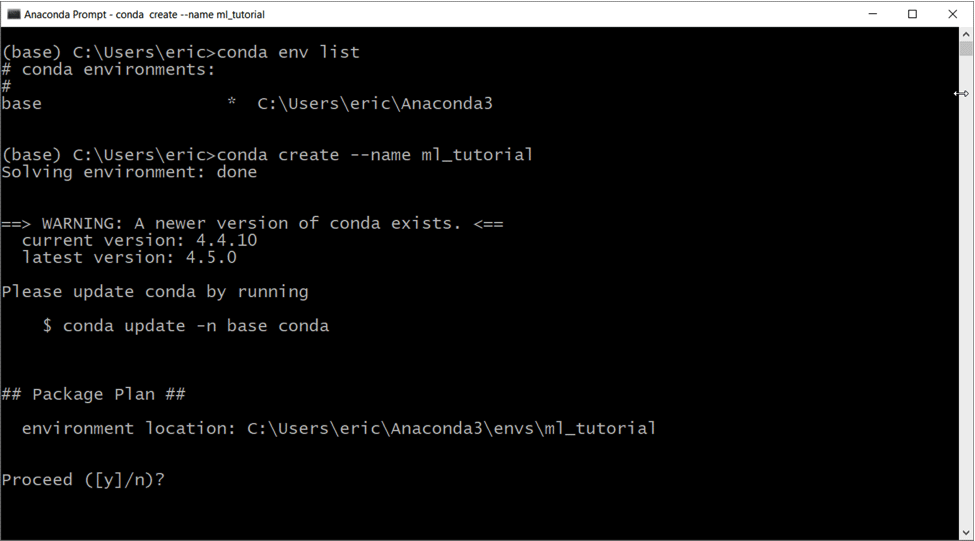
Step 2.4 You will be prompted to "Proceed." Type 'y' and press Enter to continue creating the environment.
Once the environment setup has been completed, a command will be displayed to switch the new environment.
Step 2.5 Run the command below to activate the new Conda environment.
conda activate ml_tutorial
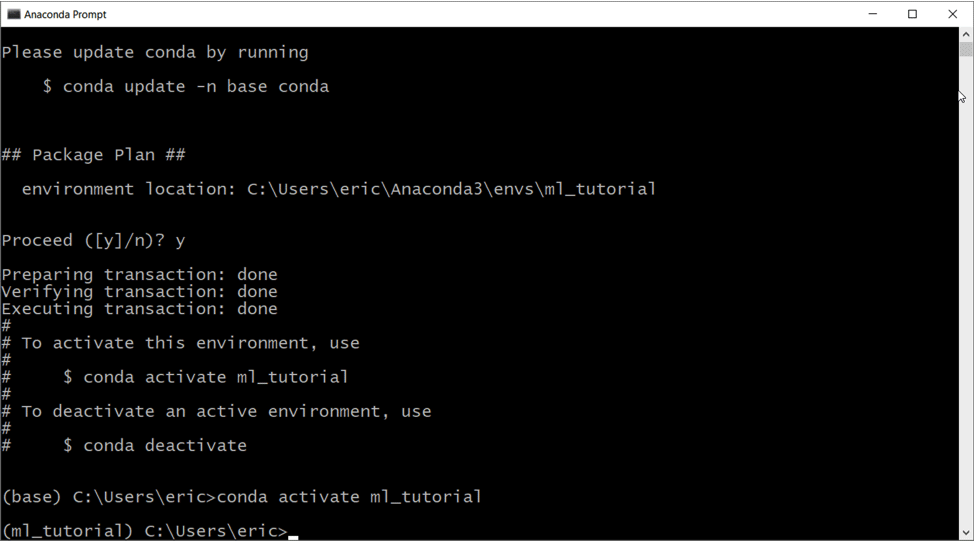
Once the environment is switched, the name of the new environment will appear in the command prompt. Seeing the environment name is helpful because it reminds you of the environment in which you are currently working.
Step 2.6 Next, several packages need to be installed to enable machine learning software development. Run the following command to install the needed packages:
conda install pandas matplotlib scikit-learn numpy
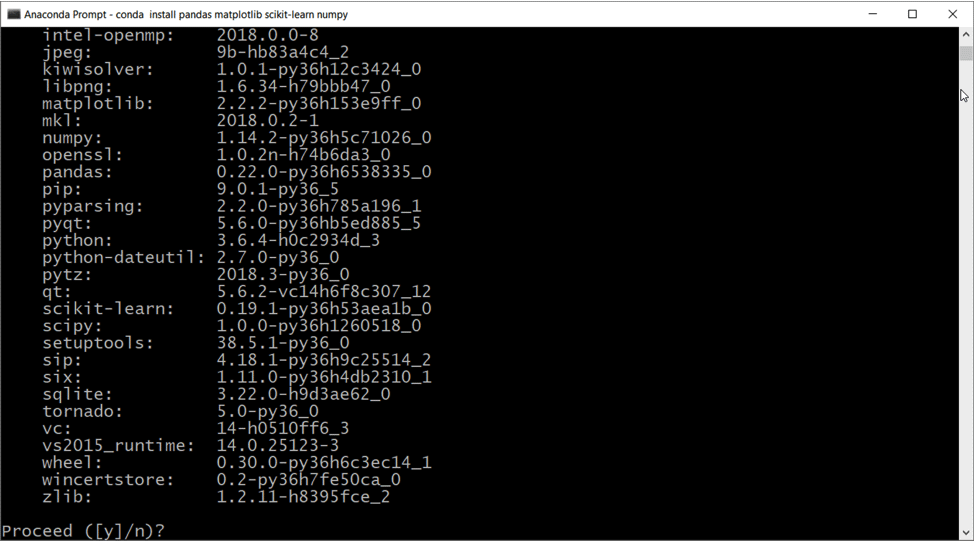
Step 2.7 Similar to creating the environment, when installing packages with Conda, you will be prompted to confirm you want to proceed. Type 'y', and press 'Enter'.
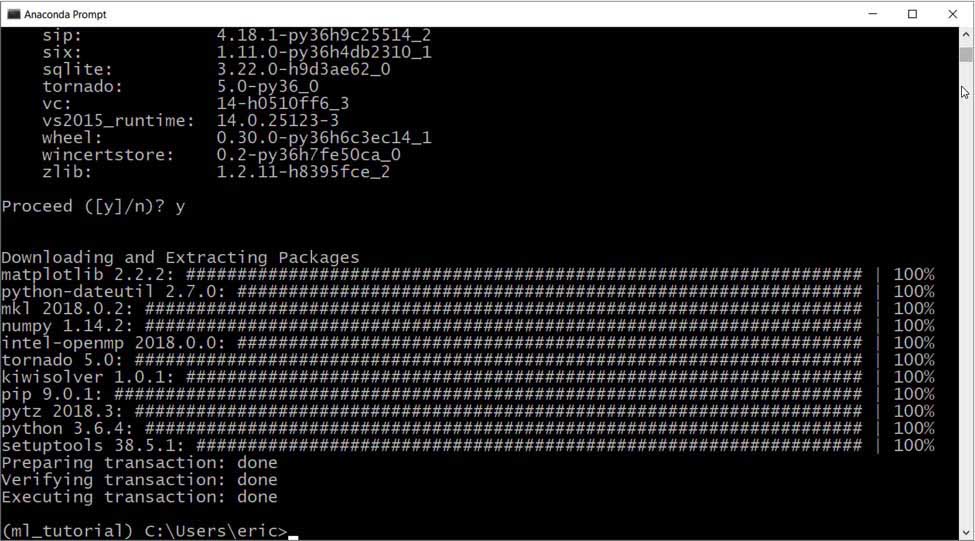
A successful install will look similar to the screenshot above.
Step 3. Run Jupyter Notebooks
With the environment now set up, Jupyter Notebooks can be started. It is installed as part of Anaconda. Before running Jupyter Notebooks, a working folder first needs to be created. On my system, I create my projects within my "git" folder, underneath my user folder. It does not matter where you create your folder, so long as you have a folder to store all of your code files for this tutorial. Below is an example of creating my folders.
Step 3.1 Create a folder on your system to store the project files.
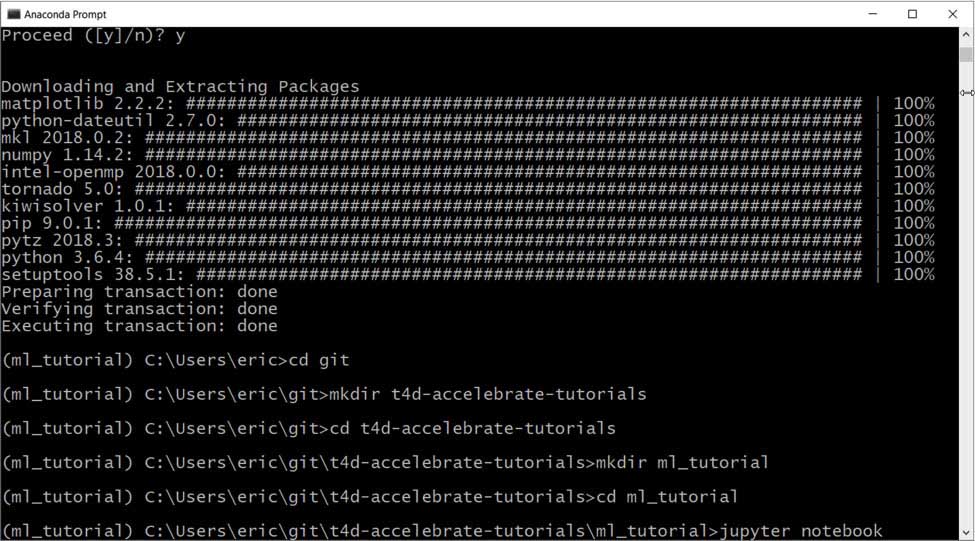
Step 3.2 Once the folder has been created, run the following command:
jupyter notebook
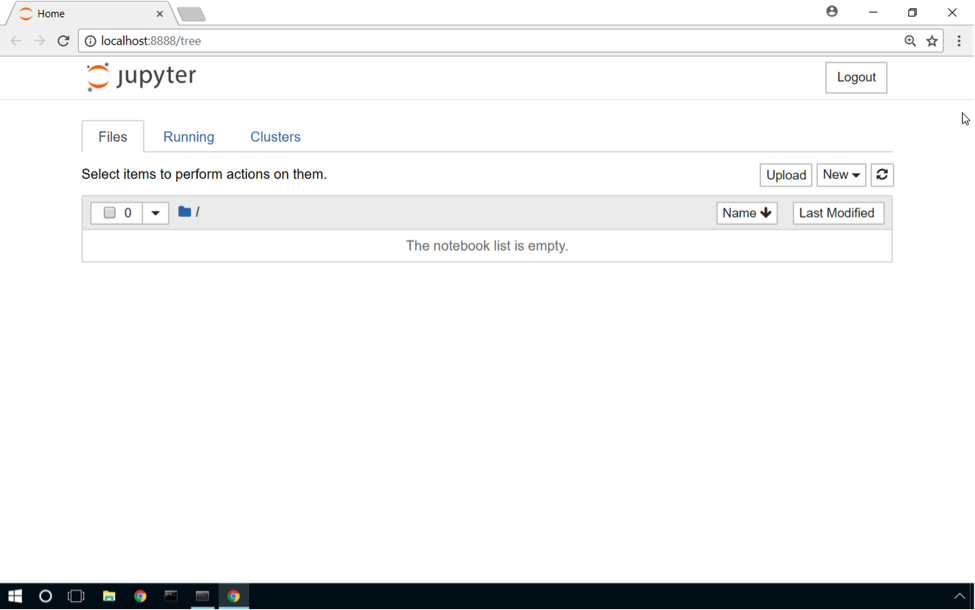
The Jupyter Notebook server will launch, and your default web browser will open to the Jupyter Notebook home page.
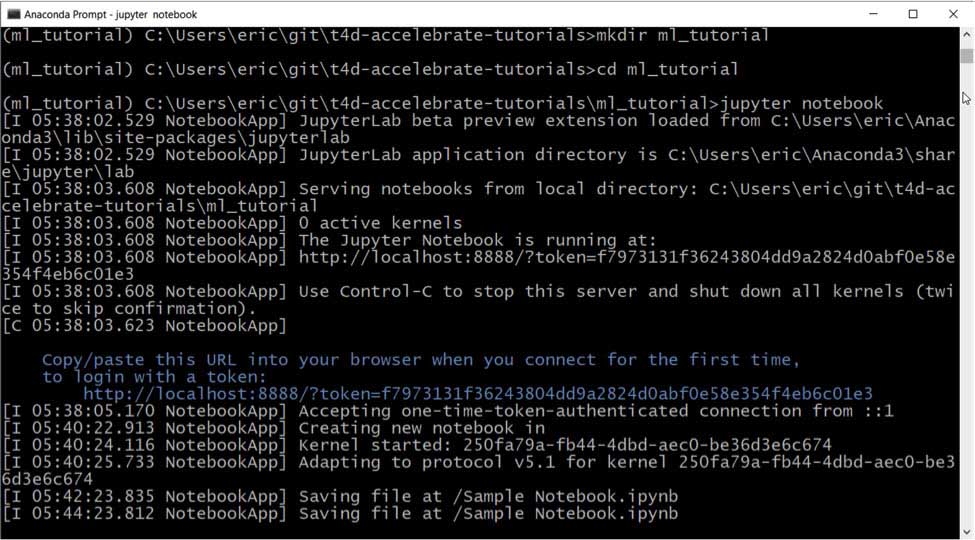
If for some reason the browser does not launch or the browser window is closed, the Jupyter Notebook homepage can be reloaded using the link from the command prompt window. The link is listed below. Copy and paste the entire link, including the token.
Step 4. Creating a Jupyter Notebook
The final step for this tutorial is to create our first notebook.
Step 4.1 Create a new notebook by clicking 'New' and then click 'Python 3'.
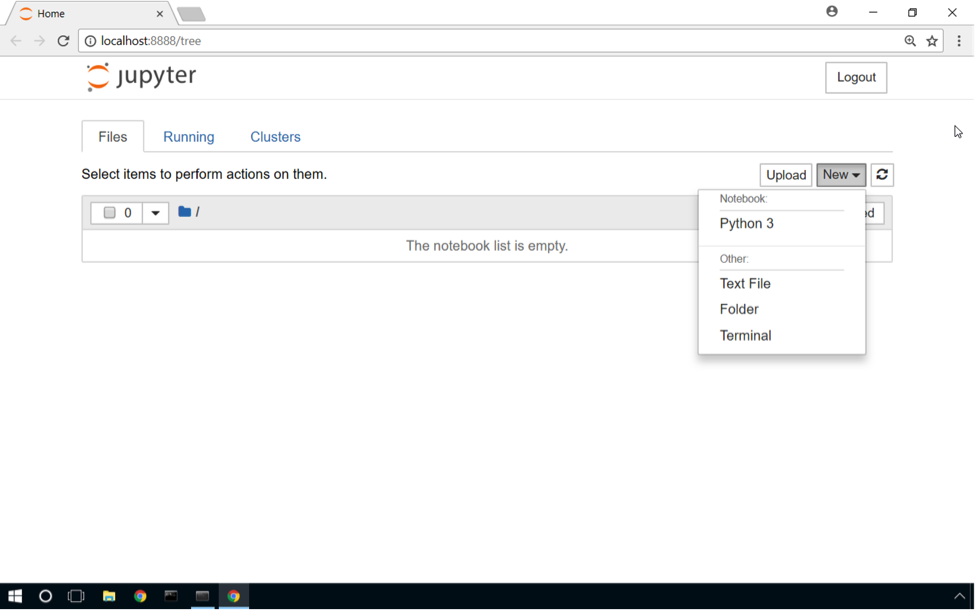
A new tab will appear in the web browser with a new, empty notebook.
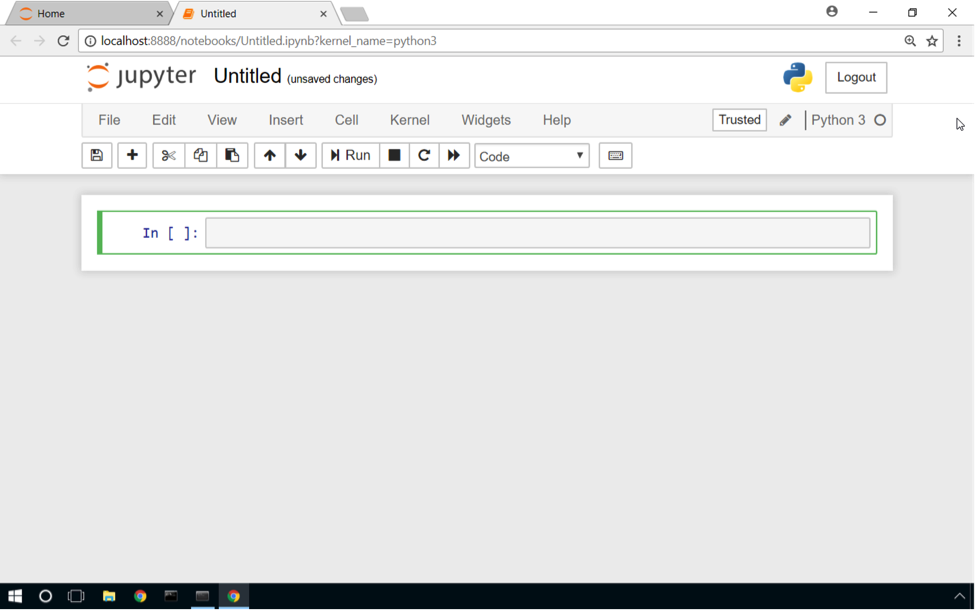
Step 4.2 Click on "Untitled" to rename the new notebook.
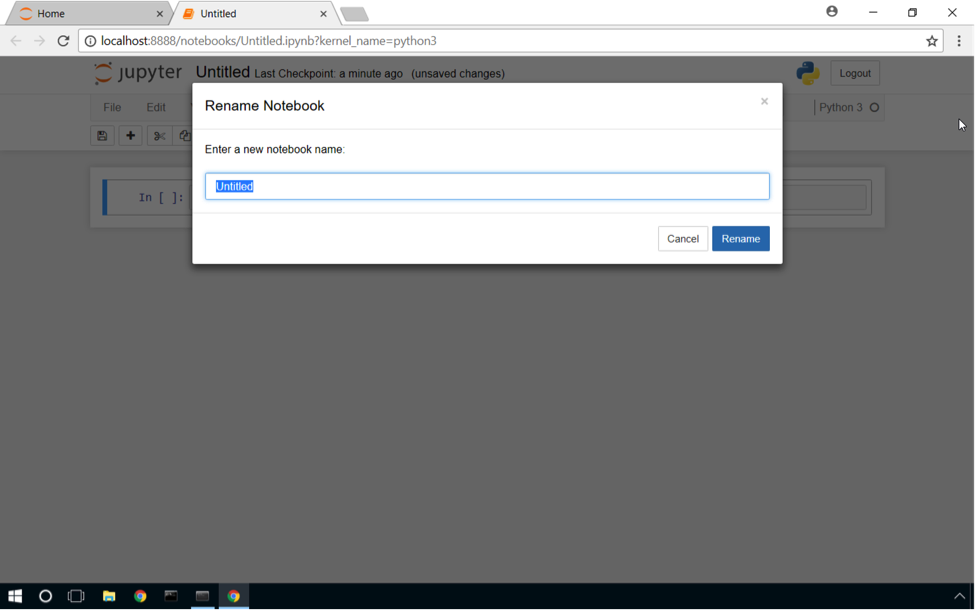
Step 4.3 Type in the name "Sample Notebook". The name will be used for the name of the notebook and the file name of the notebook. Click 'Rename'.
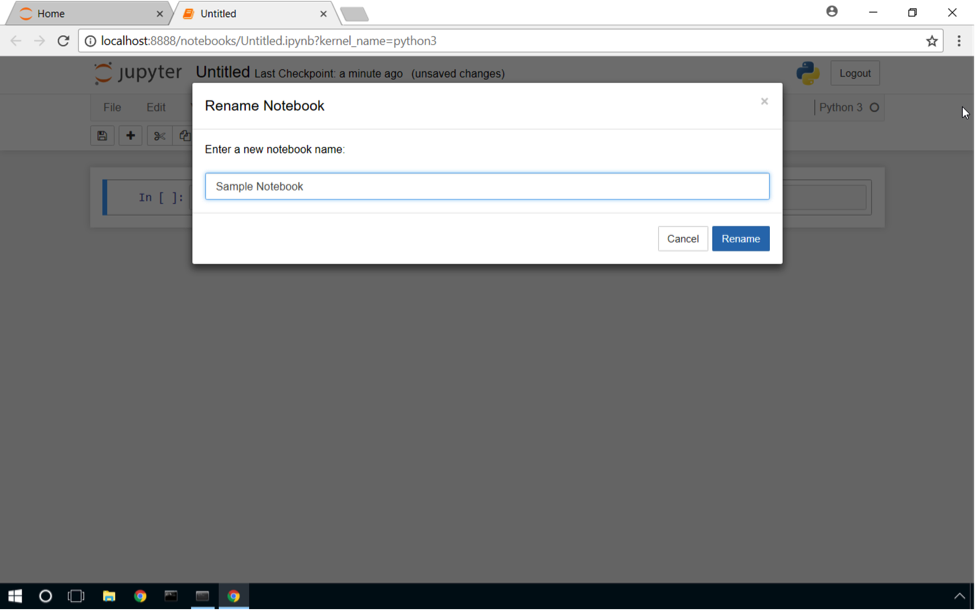
With the notebook renamed, some code needs to be added to the new notebook.
Step 4.4 Copy and paste the following code into the first notebook cell:
from sklearn import datasets, svm

# load digits data from scikit learn
digits = datasets.load_digits()

# configure support vector classification
# gamma is kernel coefficient
# C is the penalty parameter, default is 1,
# more noisy data should be a lower value, less noisy a higher value
clf = svm.SVC(gamma=0.001, C=100.)

# train with all data except the last image
clf.fit(digits.data[:-1], digits.target[:-1])

# predict using the last image
clf.predict(digits.data[-1:])
Each section of code (or other content) is called a cell. Jupyter notebooks are made up of many cells. Cells can include content such as Markdown to add documentation to Jupyter notebooks.
Step 4.5 Click the 'File' menu item and click 'Save and Checkpoint' to save the file.
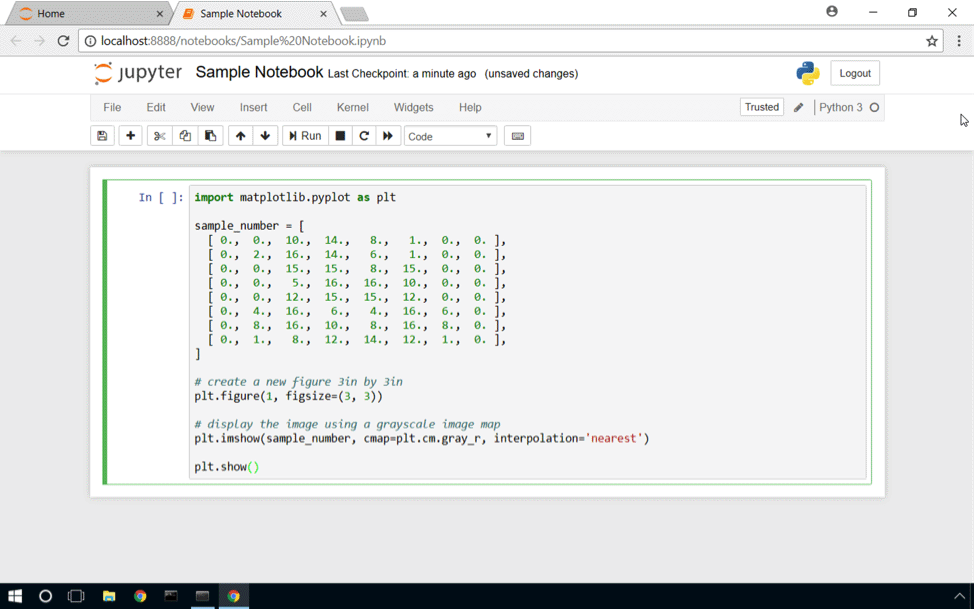
Step 4.6 Then click the 'Run' button to run the notebook. If an image does not appear the first time, click 'Run' again and it should appear.
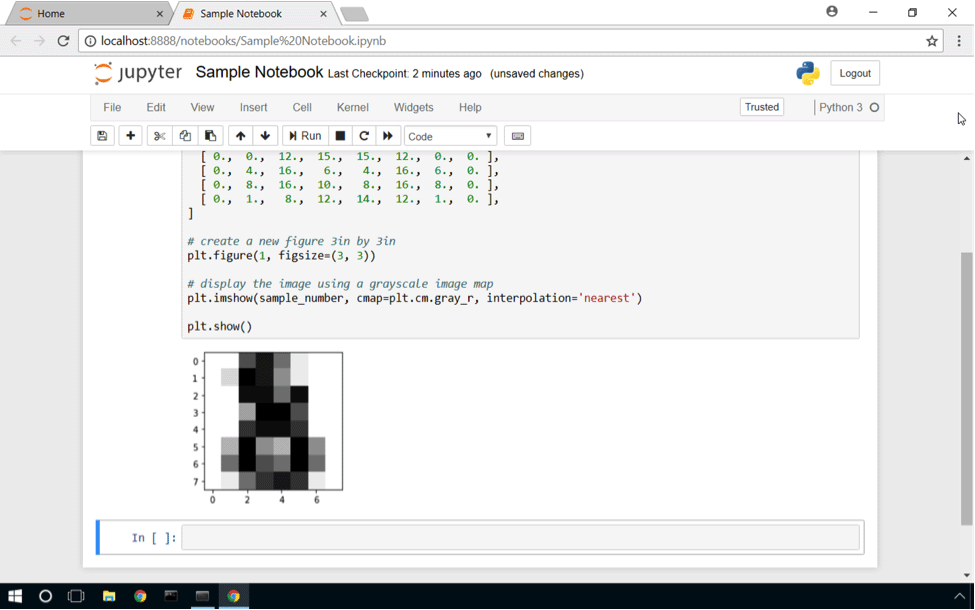
If the program runs successfully and an image appears, then the tutorial has been completed successfully. To close the notebook, simply close the browser tab.
Conclusion
In this tutorial, we configured a development environment for Machine Learning with Python. As part of the configuration, we installed Anaconda. Anaconda is a specialized distribution of Python which Jupyter Notebooks and numerous other tools for scientific, data science and machine learning Python programming.
The environment and package manager Conda was introduced, and we configured new a Conda environment. This configuration included downloading needed packages for doing machine learning software development.
Finally, we launched the Jupyter Notebook server, created a Jupyter Notebook, and executed a small Python program. The program demonstrated some of the features of Jupyter Notebooks including displaying images.
In the next two tutorials, we will explore machine learning classifications with a Support Vector Machine (SVM) and SVM Advanced Techniques.


